
Discord Inktober Bot (Netlify functions to the rescue!)

Hey 👋🏻 !
I'm Kevin, a full-stack developer running a digital prototyping company with my business partner called Spin Up.
When I'm not consulting and building for clients, I'm writing content here, curating my newsletter or creating videos.
Outside of work, I enjoy handing out with my wife and sons - camping, hiking and kayaking or just curling up with a good book.
In 2009 Jake Parker started Inktober. It was a challenge to improve inking skills. Based on single word prompts, he inked and posted a picture every day. It's become a pretty popular thing.
I am on some awesome Discord servers that have Inktober channels. Each day, a member shares the single word prompt and encourages others to draw. The hope is that people will draw and then share.
On one of these servers yesterday, Colby thought it would be cool to automate this.
i have no idea what goes into Discord bots, but if someone wants a little project, an Inktober bot would be awesome, and something i would imagine other Discords would be happy having. you can make it a PR so it's a hacktober fest contribution :smile: - @colbyfayock
Not wanting to let him down, I decided to give it a shot.
Is this overkill?
This 'bot' didn't require any interaction. It needed to post a message at regular intervals in the month of October. After a bit of research, I worked out that sending a message via a webhook was pretty straight-forward.
You need to be a mod on a Discord server to create a webhook. You go to your integrations and follow four simple steps. Here's how I did it on Space Jelly ( come join us!).

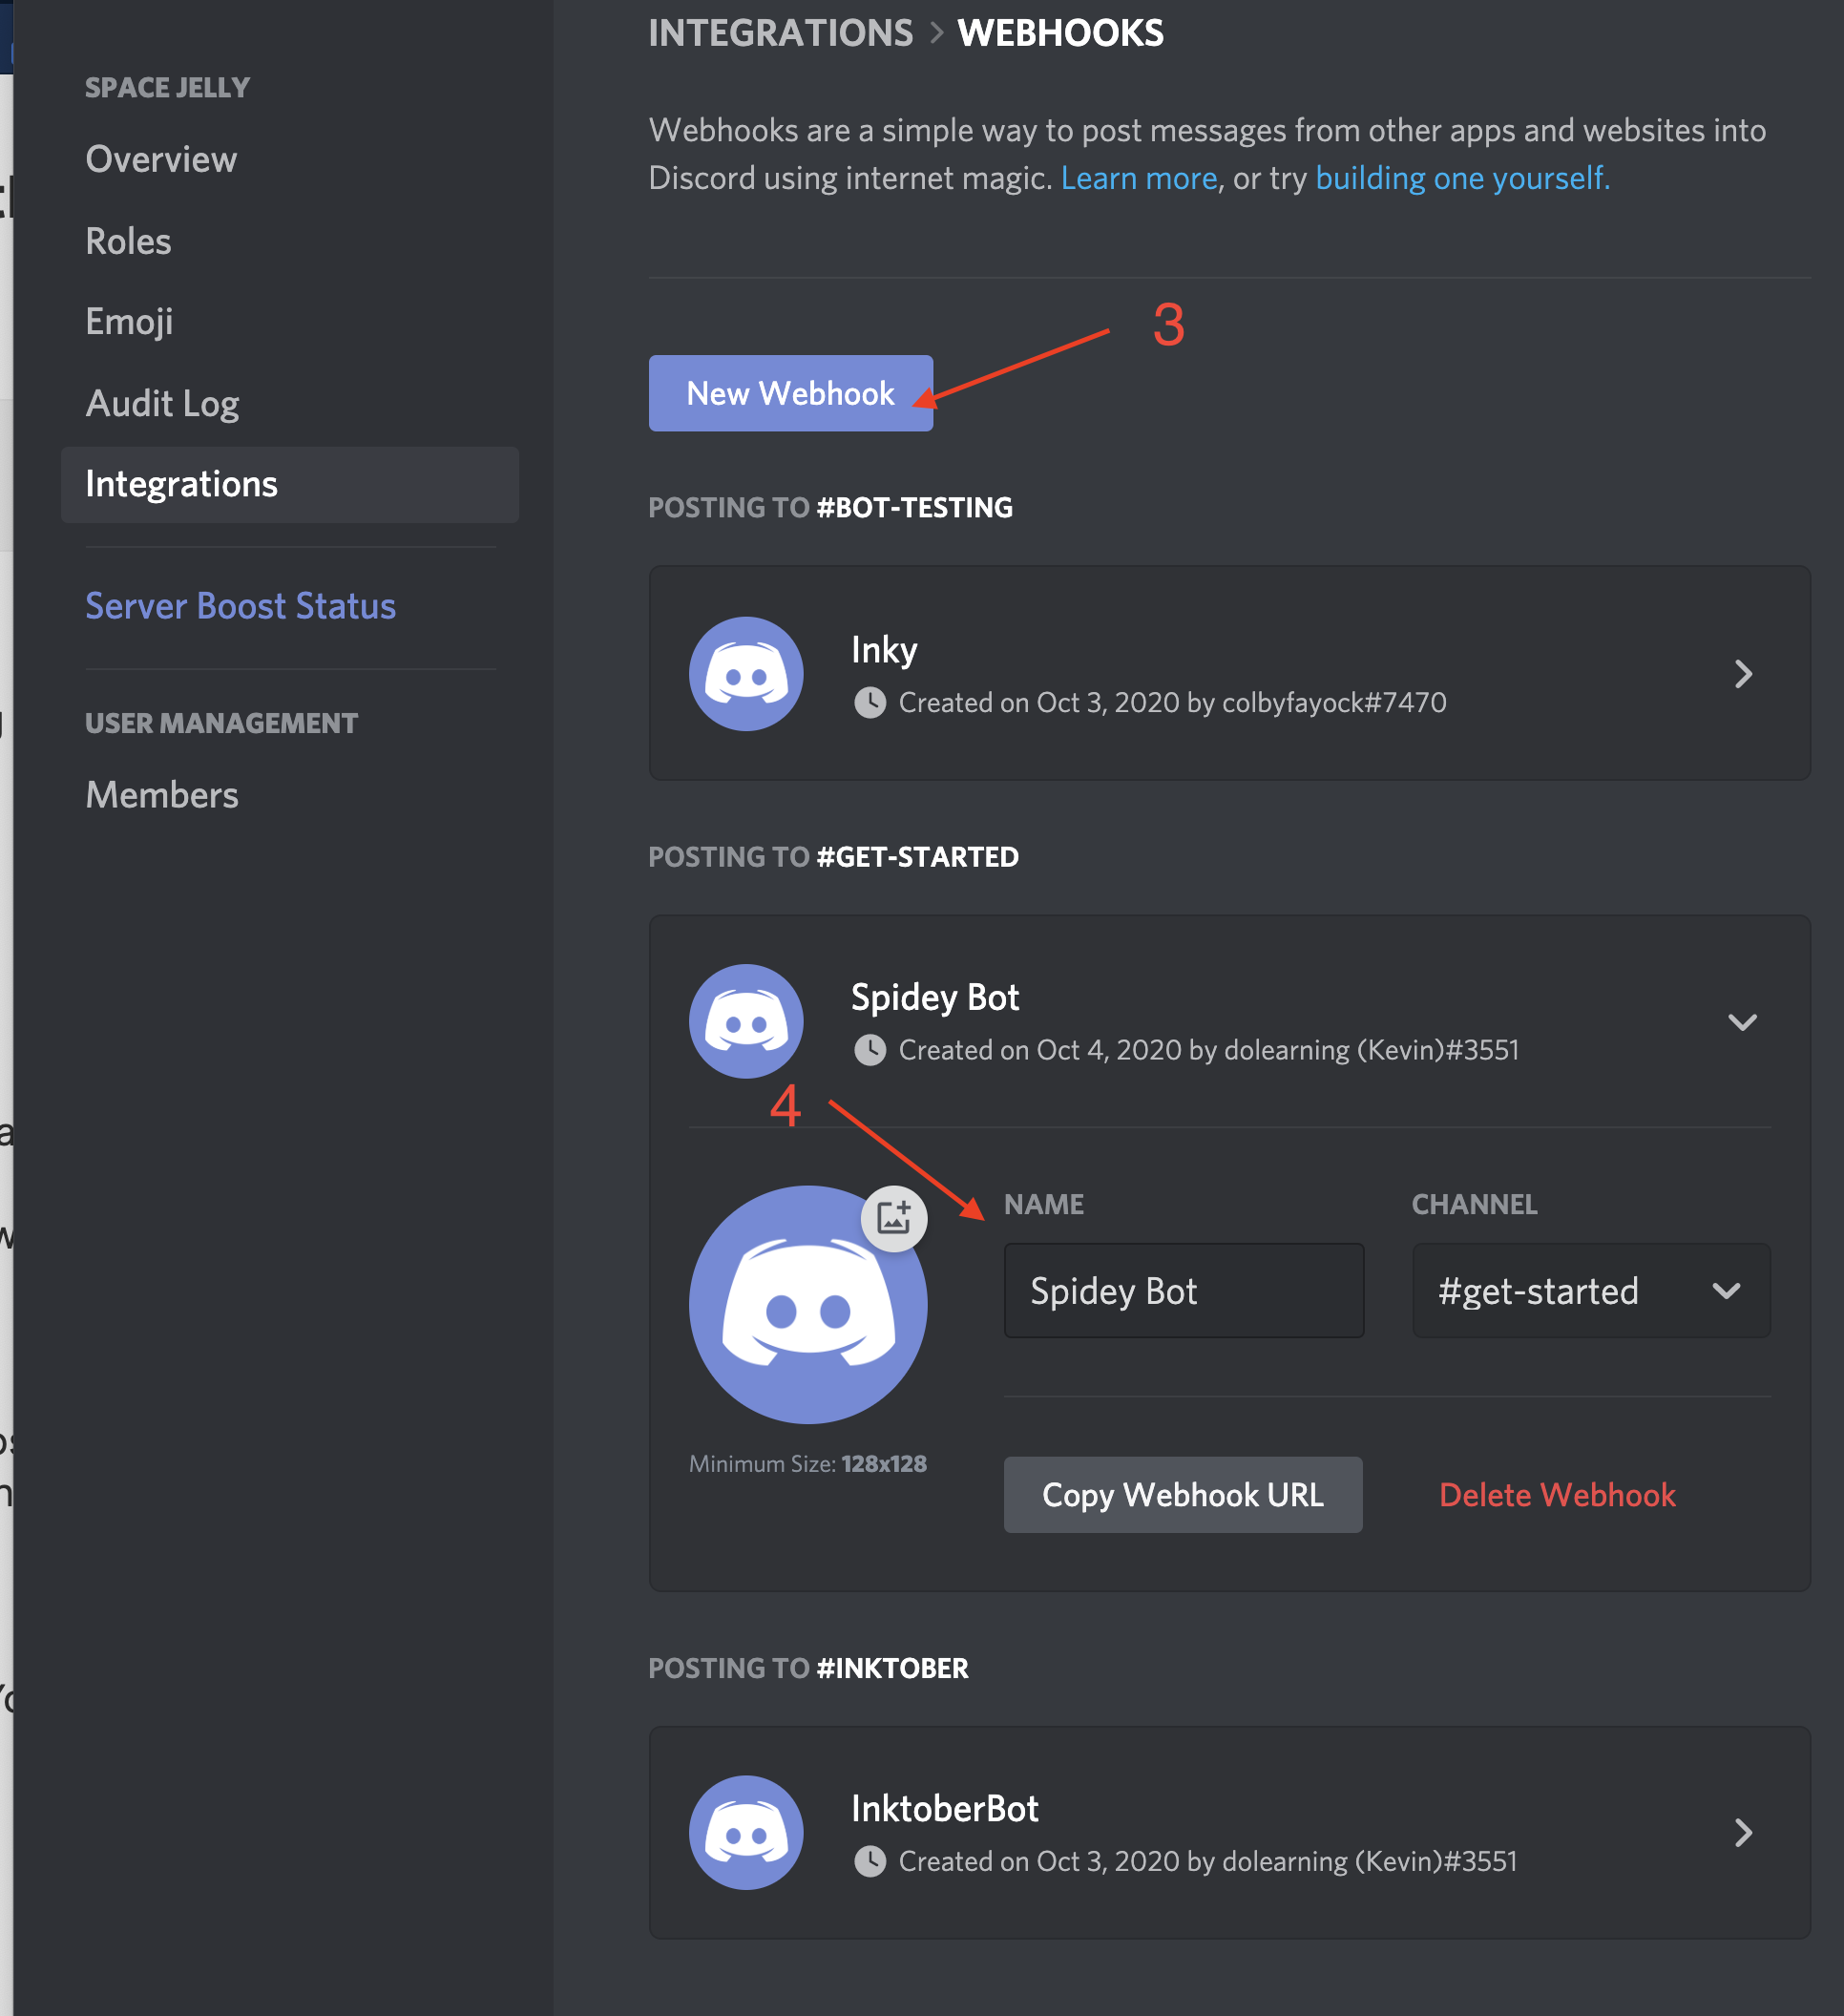
Click that Copy Webhook URL button and keep it handy, along with the bot name.
Testing your webhook works
It's time to pop open your favourite API client to see if your webhook is working. You're going to post to the URL with a JSON body. It should look like this:
{
    "username":"InktoberBot", // Your bot name :)
"avatar_url":"https://pbs.twimg.com/profile_images/786663388311003137/NwU1GGeL_400x400.jpg", // this is an image file you might want to have for your bot but it isn't required
    "content":"I'm going to post me some Inktober content soon - look out for it!" // that actual message.
}
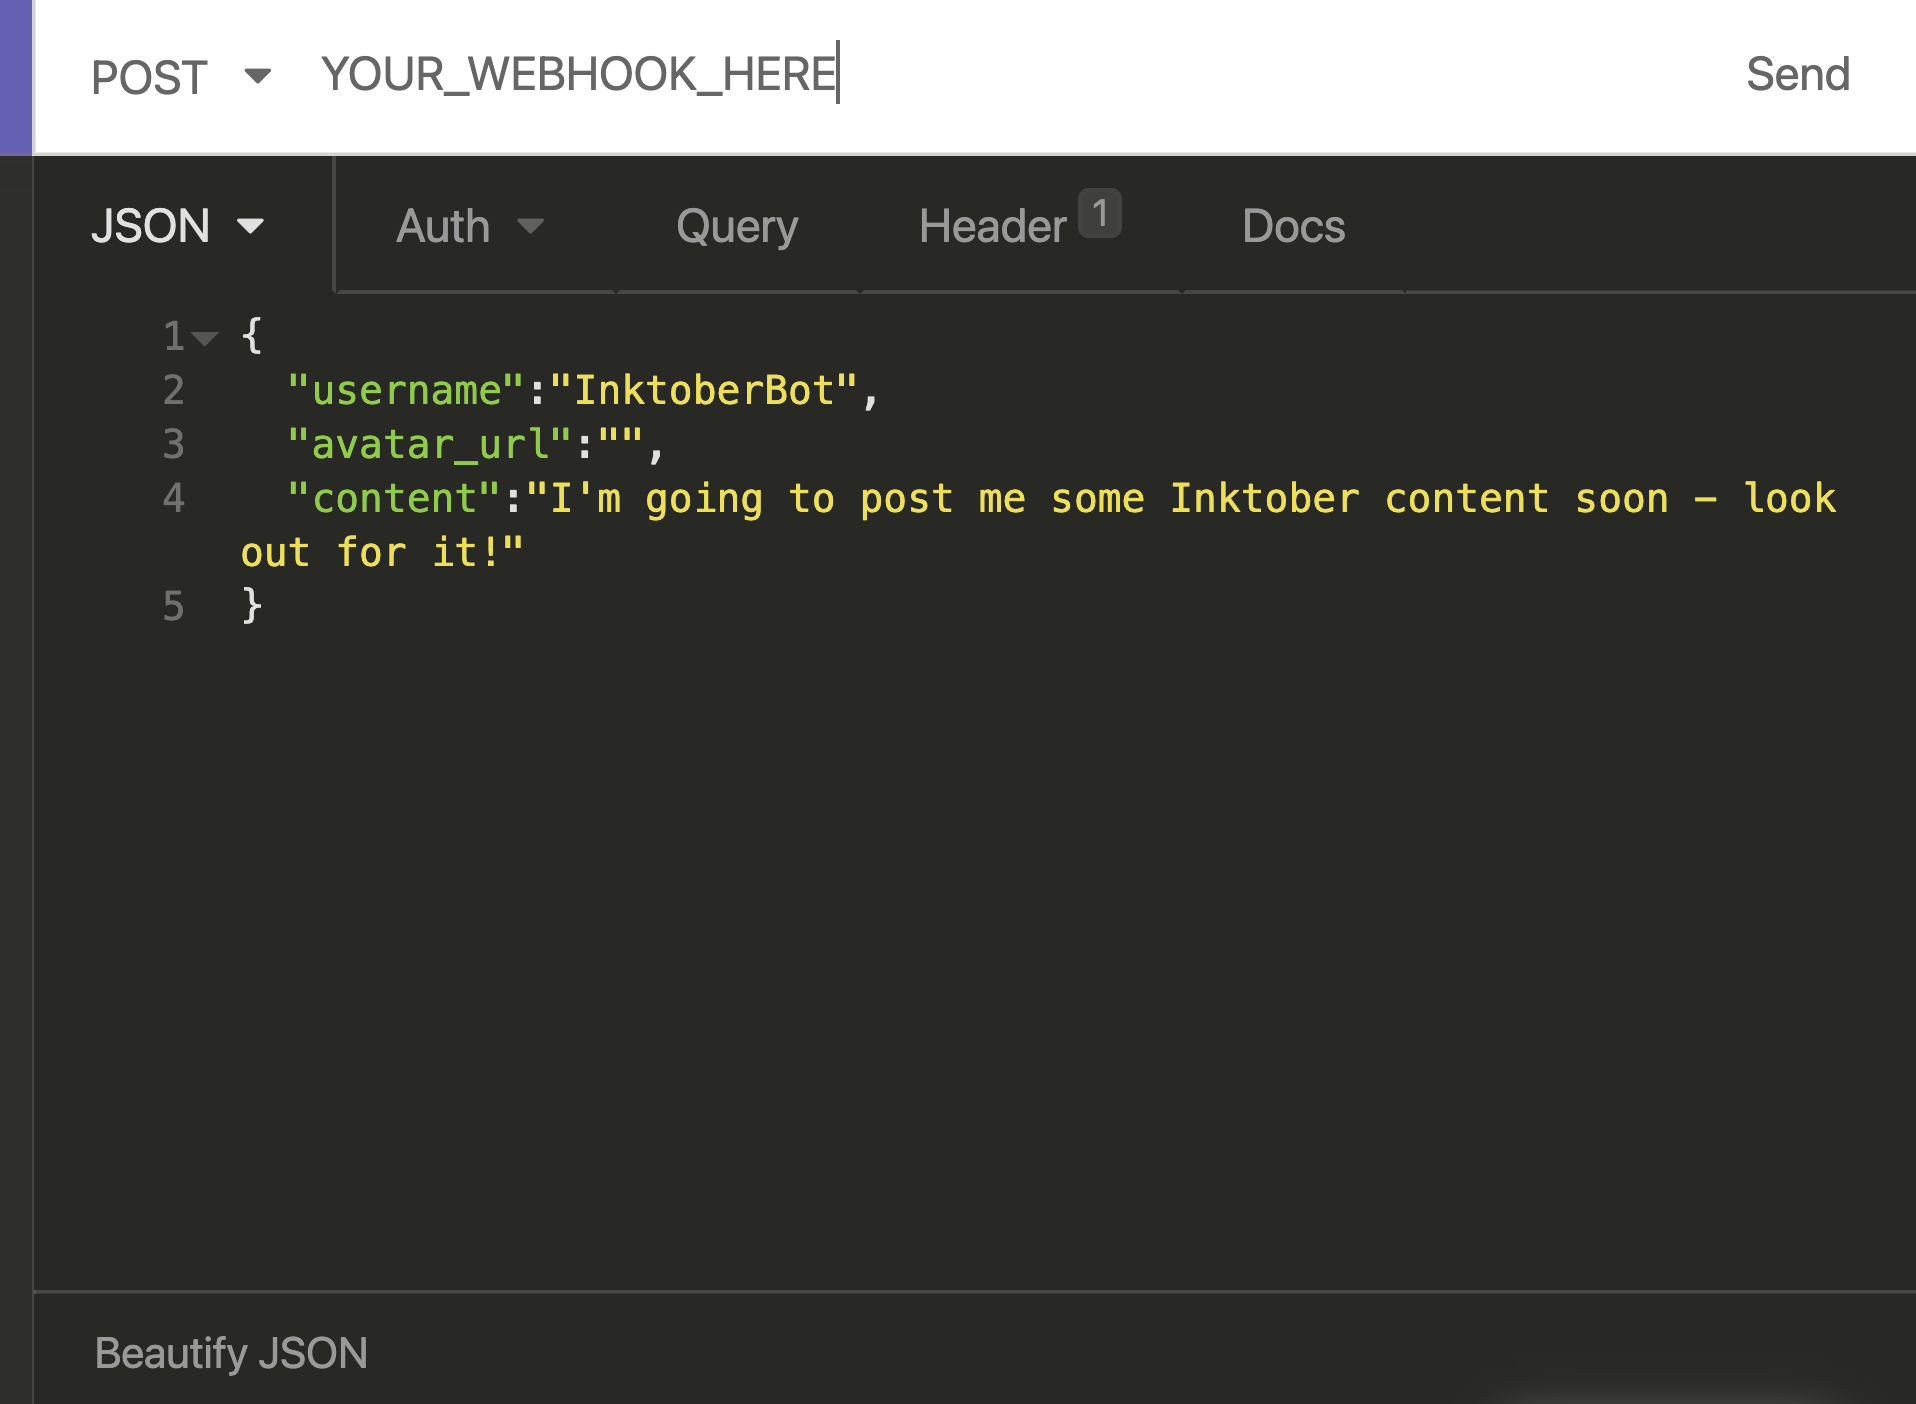
Your message should appear in the channel you selected for your webhook. Go check! :)
Netlify function
tldr; Here's my code which you're free to have!
I decided to use Netlify serverless functions because they've been easy to use in the past. I did have a few configuration problems but Colby helped me keep it on track :)
The main work happens in src/discord.js. I've got openings, the themes and finishings for each message.
When the function runs it returns a random opening, today's theme and a random finishing. This message is then pushed to the channel with the webhook.
If you want to fork this and add your own things then feel free.
Setup
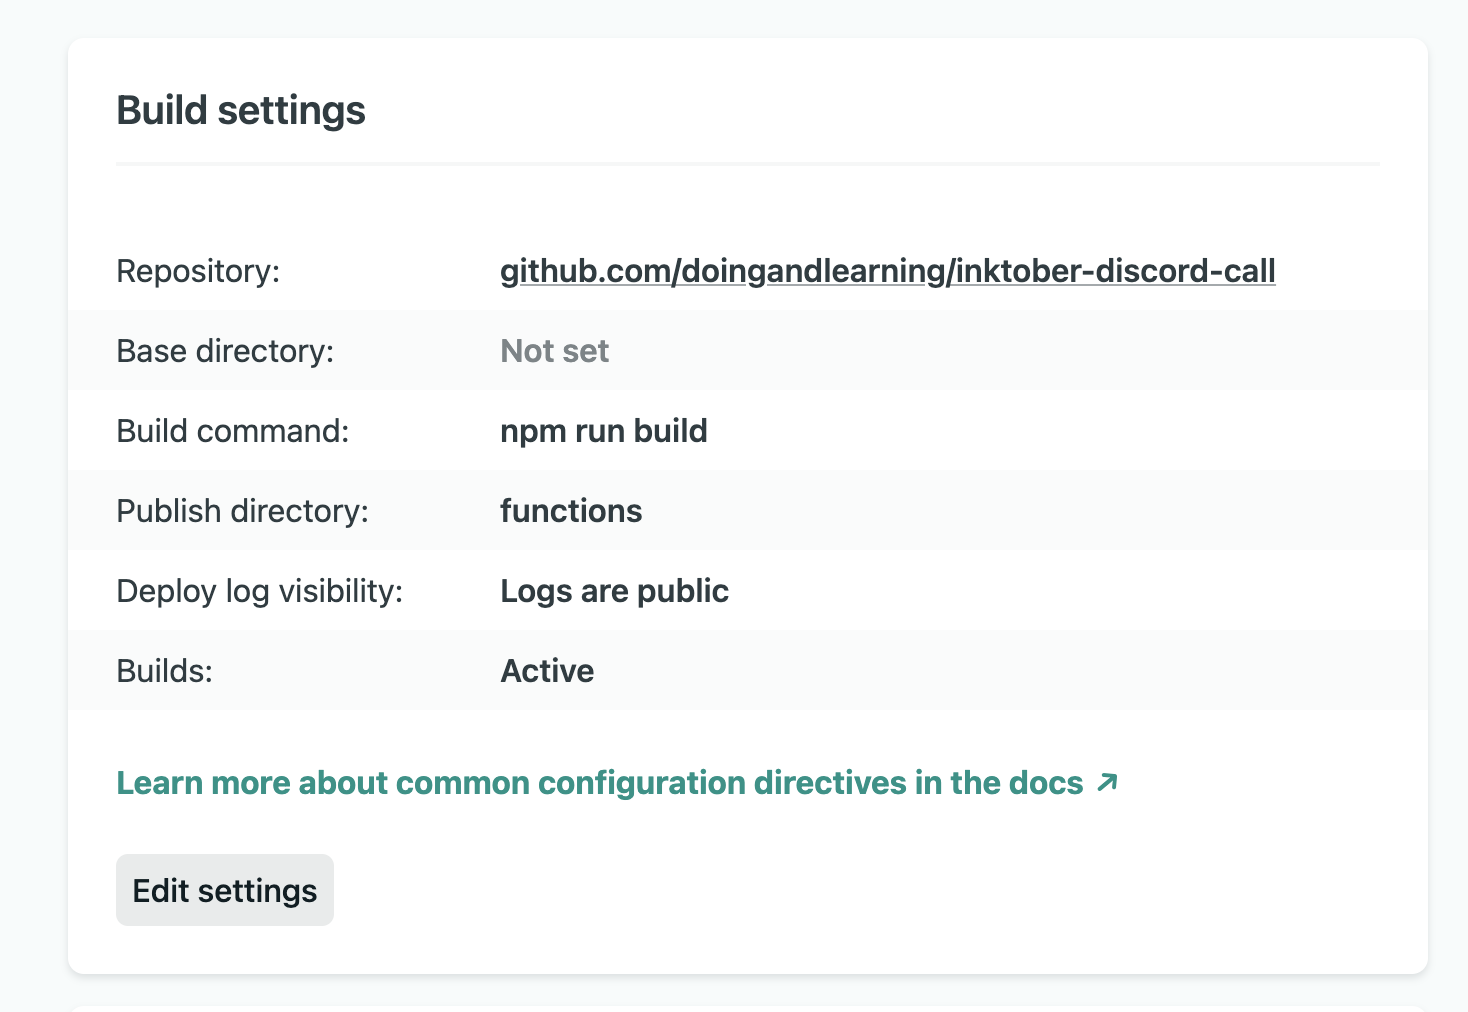
There is a nice button there to launch this in Netlify. You can add the variables you noted earlier on. The last bit of setup needed on Netlify is in the build and deploy settings. This tripped me up a bit but this is what they should look like. I've updated the netlify.toml file so this mightn't be a problem for you :)
Triggering the bot
Once you have deployed to Netlify, you will have an app URL. To trigger the message you'll go to <APP URL>/.netlify/functions/discord. This should send the correct message to the correct channel.
These functions are serverless. That means that they only run on demand and so can't trigger themselves at set intervals. To be able to trigger them, we need to use another service. I used a service called EasyCron (other vendors are available). I set up some rules about when I wanted the URL triggered.
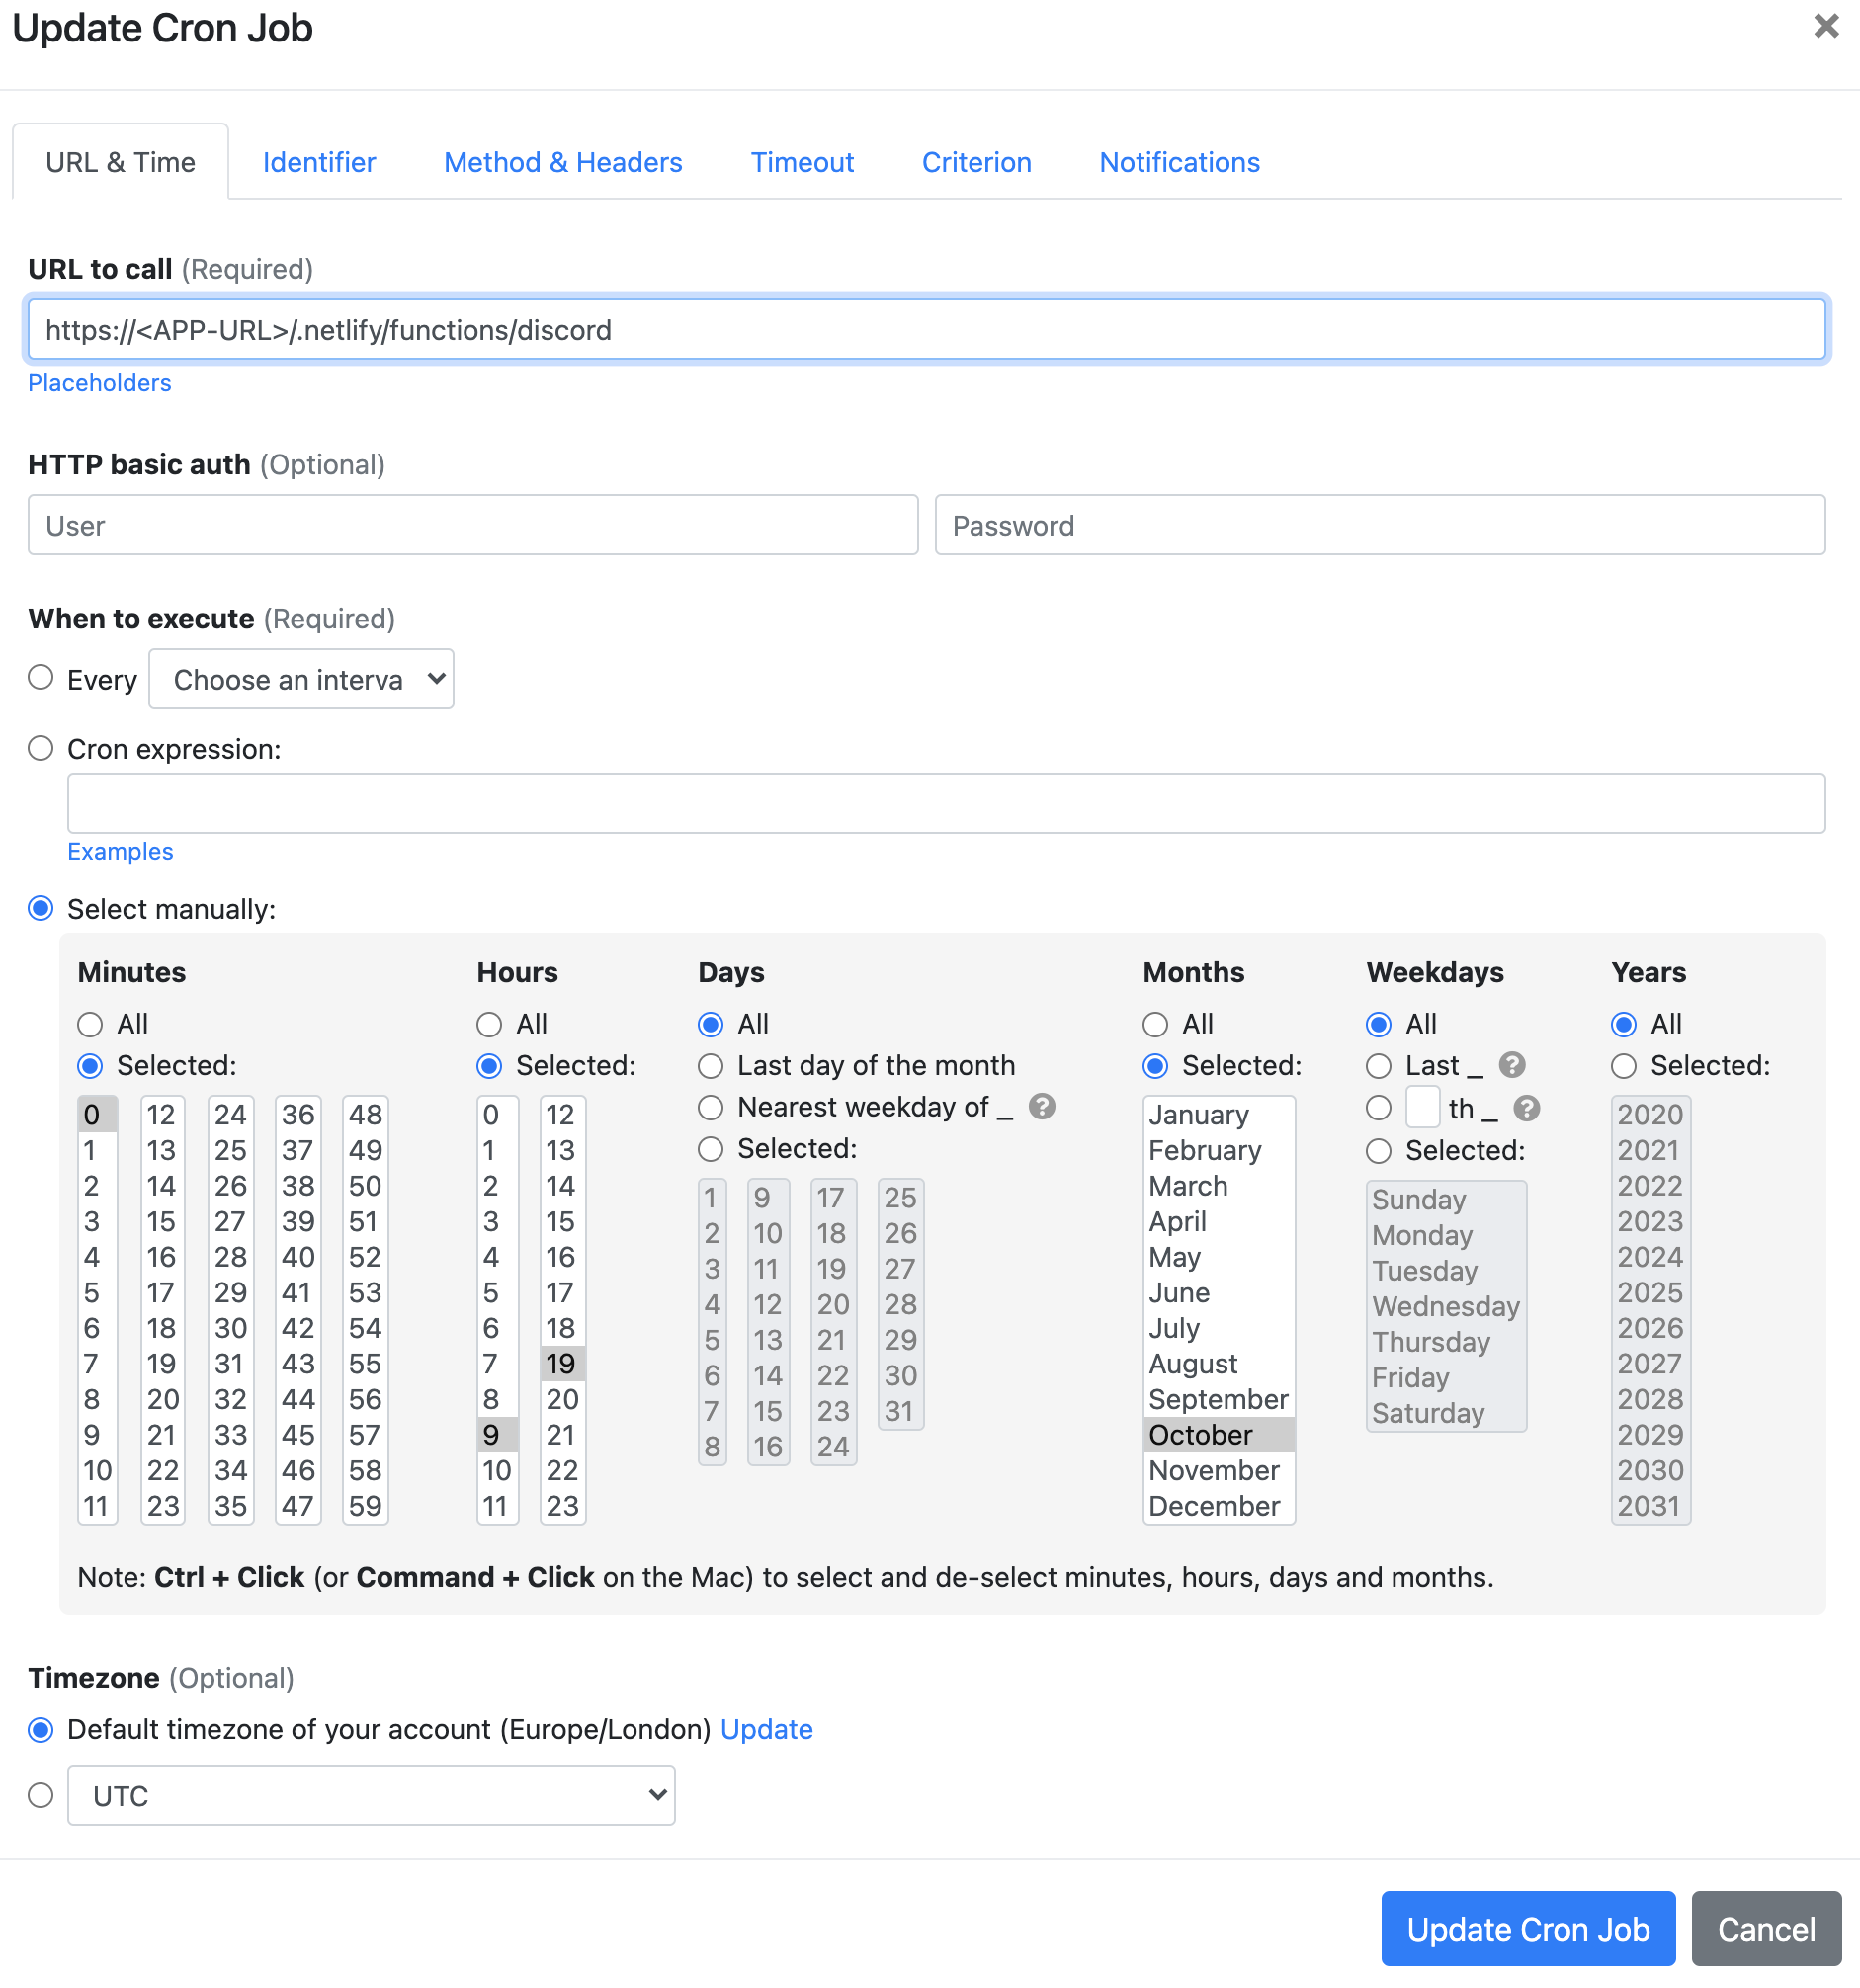
Different timezones are represented in Space Jelly, so I have it trigger a few times a day during the month of October.
Your turn
I hope you've found this interesting and maybe useful. I'd love to hear about how you use this in your servers!
Follow me on Twitter and sign up below for my newsletter if you want to keep in touch.


